








Skip to content
View in the app

A better way to browse. Learn more.

www.CameraLoops.ru

A full-screen app on your home screen with push notifications, badges and more.

To install this app on iOS and iPadOS
  1. Tap the Share icon in Safari
  2. Scroll the menu and tap Add to Home Screen.
  3. Tap Add in the top-right corner.
To install this app on Android
  1. Tap the 3-dot menu (⋮) in the top-right corner of the browser.
  2. Tap Add to Home screen or Install app.
  3. Confirm by tapping Install.
Articles

The two best perfume on planet earth.

From ancient times, perfume has played a significant part in our lives and well-being. We use perfumes for various traditions and occasions. It has been said, "A satisfying scent can move many mountains." Throughout my life, I've had a yearning to collect great fragrances, which I use in various forms to enhance my character and benefit my mental well-being. Yep, great-smelling fragrance is vital for our mental and emotional well-being.
The three main characteristics I look for in a fragrance are.
Uniqueness
Pleasant 
Longevity
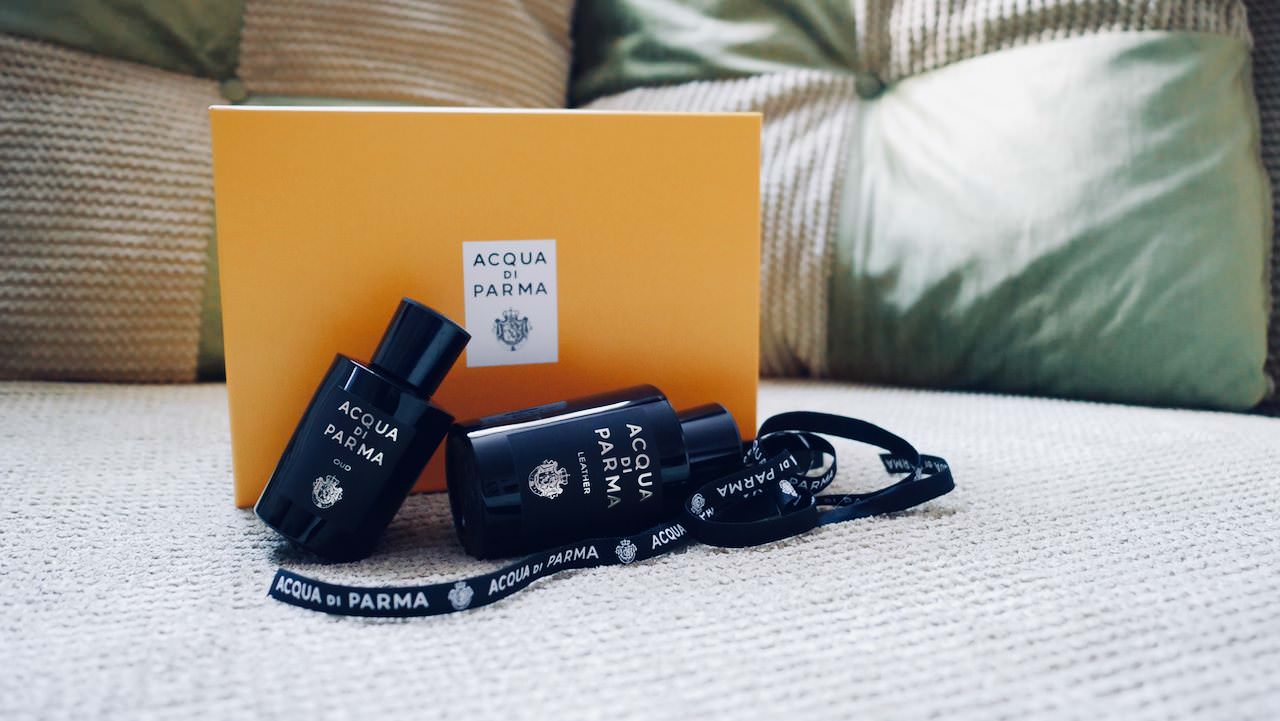
Today, I'll write about two perfumes that I think have wonderful scents. They are Oud and Leather by Acqua Di Parma.
Acqua Di Parma is an Italian fragrance company located in Parma, Italy. They released their first perfume, Colonia, in 1916.
 

Colonia Oud
Acqua Di Parma released the Colonia Oud in 2012. 
The Colonia Oud scent is categorised as:
Top Notes: Bergamot and Orange
Heart Notes: Haitian Amyris Oil, Russian Coriander and Agarwood oil (Oud)
Base Notes: Cedarwood, Leather accord, Patchouli Oil, Sandalwood and Musk
The opening scent of the Acqua Di Parma Oud is uniquely amazing and welcoming. It's a well-balanced fragrance which is not overpowering and can be worn in all seasons. If you're an Agarwood (Oud) enthusiast and seeking an Oud fragrance mild with a more modern, welcoming twist, you should try the Acqua Di Parma Oud.


Colonia Leather
My other favourite is Acqua Di Parma Colonia Leather.
Acqua Di Parma released Colonia Leather in 2014.
The Colonia Leather scent is categorised as:
Top Notes: Brazilian Orange, Sicilian Lemon and Raspberry Accord.
Heart Notes: Red Thyme, Honeysuckle, Petitgrain and Rose Accord.
Base Notes: Leather accord, Cedar and Paraguayan Guaiac Oil.
Although the fragrance is called leather and does have a leather scent mixed in, the leather scent is not distinct. It does not smell like a leather sofa. To my nostrils and brain interpretations, the Colonia Leather has a very unique, sophisticated, and luxurious aroma, a captivating scent that places my consciousness into a calm, relaxing comfort zone. Between the two perfumes listed, I find a calling for the Colonia Leather over Colonia Oud. Both are great perfumes with excellent longevity, and I have no regrets. 
Happy smelling.


Troy
By Troy in Articles ·
Articles

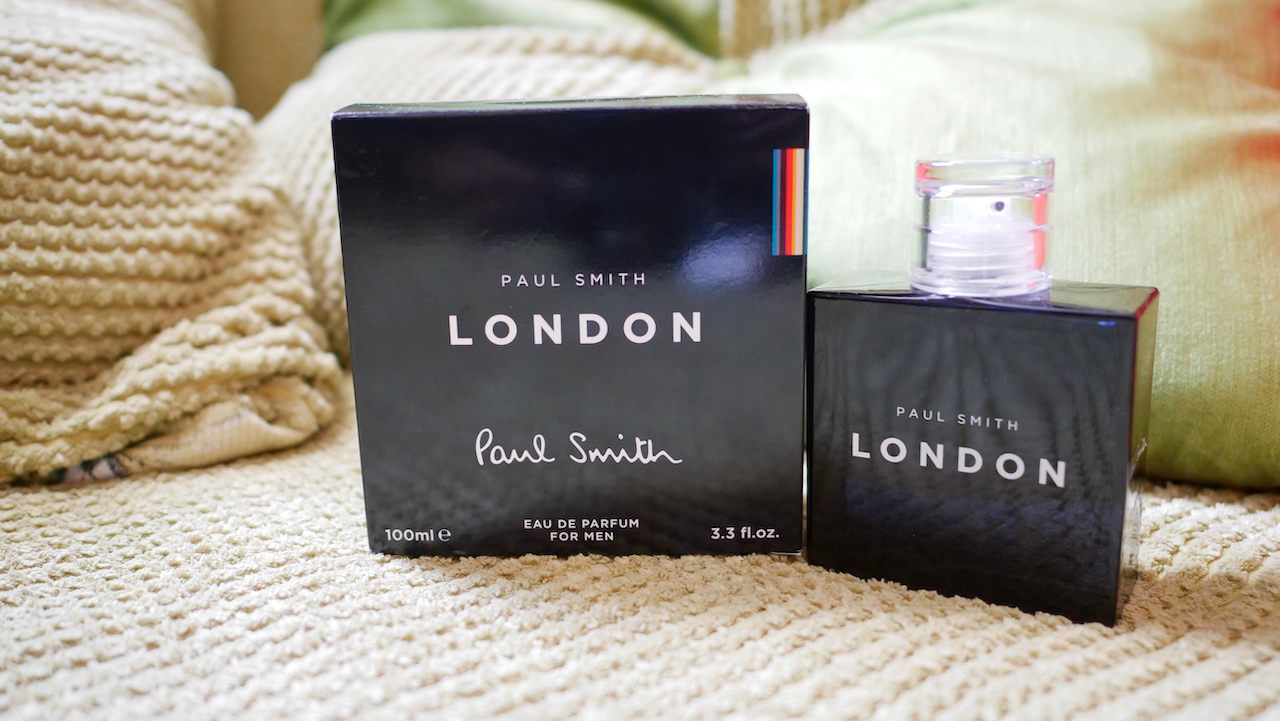
Paul Smith London men's perfume relaunch.

One of my favourite men's perfume is London by Paul Smith.
Reasons being, it has a very pleasant ancient unique odour and it's very long lasting, for example, if I spray it on my skin the fragrance will last all day. If I spray it on my clothes, after two days I can still smell it. Many perfumes when first sprayed will give off a nice fragrance then after a few hours, that nice fragrance fades away and leaves a base note scent, which is different from that first scent. With Paul Smith London it is different. After two days I can still smell the original first sprayed fragrance on my clothes.
I bought my first bottle way back in 2004, a 100ml bottle for £30 I think, which was always in my collection, I had two 100ml bottles of the original in total over the years, yep a 100ml bottle of this perfume can last me for up to four years. Three squirts that's all it takes. A few years ago my final bottle had about a quarter left so I checked online to see where I could find a bottle. This was bad news, I found out that Paul Smith had discontinued making it and a lot of folks out there including myself was disappointed. Some people were selling a 100ml bottle on eBay for £200, Yep' folks who were addicted to the nostalgic fragrance of the Paul Smith London were splashing out £200 for a 100ml bottle which cost £30 before it was discontinued. As mentioned before, I had a 100ml bottle of the original with about quarter left, A bottle which I cherished and baby sprayed every now and again hoping to keep the unique scent to the end of my time. Last Sunday I did an eBay search to see how much the original was going for. To my surprise, someone was selling a Paul Smith London in a square bottle. I did a google search and realise Paul Smith had relaunched the fragrance. The same day I went to Boots Beauty and bought a bottle for £25, The Paul Smith London relaunch is even cheaper than the original from a few years ago. I was a bit sceptical on the purchase as I didn't know if it smells and was long-lasting like the original. After comparing both the relaunch and the original  I confirmed, yes' the relaunched Paul smith London men's perfume has the same scent and longevity as the original. The only downside is the bottle shape and packaging. The original London fragrance came in a round spiral bottle with a pull-top lid and a round box with a pull-top lid. With the original London, the box was more user-friendly in terms of, I can lift the lid off the perfume box, lift the lid off the bottle and squirt away. The relaunch box is now a standard box, which is fiddly to take the perfume out and back in. Meaning there's no point keeping the box. The relaunch bottle lid is a screw type, which is fiddly to unscrew each time to do a squirt. I guess Paul Smith has changed the bottle shape and packaging to match their other line of fragrances. The relaunched London bottle has the same shape and twists top lid as the Paul Smith Extreme fragrance. Nonetheless, it's the scent that counts and I'm truly grateful that Paul Smith has chosen to relaunch this great smelling fragrance back on the market at an affordable price. In The UK, you can purchase it at Debenhams or Boots Beauty for £25. This time around I'll be stockpiling a few bottles just in case it gets discontinued again.
If you are a Paul Smith London fan, I suggest you do the same. Happy London smelling..
 

Troy
By Troy in Articles ·
Articles

Beats Studio 3 Vs Audeze LCDX headphones

I got a beats Studio 3 for Christmas.
I received a Dr Dre Beets Studio Three as one of my Christmas gifts this year.
I had the first Beats studio, which got lost or stolen some time ago.
I replaced that lost Beats Studio with an Audeze LCDX.
The LCDX is an excellent headphone. It's the best-sounding headphones I have ever heard. The cons of the LCDX are that it's enormous and not wireless.
After using the LCDX with my iPhone's modified mic headphone cable for over two years, I got fed up with the headphone cable dangling and sometimes getting hitched on things. I need a wireless setup for when I'm out and about.
Lucky me, Santa Claus dropped by this year with a nice new Beats Studio 3.
From my memory, the Beats Studio 3 sounds as good as the first Beats Studio, bassy and clear. It's no Audeze LCDX in terms of sound quality, but it's good enough for my moderate listening needs, which are listening to music when I'm out and listening to my laptop and Apple TV if needed.
 
From using both headphones, I'll list the pros and cons from my perspective.
The Beats Studio 3
Pros:
Wireless
Remote control for song play-pause, skip forward, backwards, mic for phone calls, and Siri ready.
Light in weight.
20 hours runtime.
Noise-cancelling 
Ok sounding.
Cons:
Not as comfy as LCDX.
Not great sounding as the LCDX.
 
Audeze LCDX 
pros: 
excelent sound.
Very comfortable 
Cons:
Heavy and large
Not wireless.
All in all, owning both these sets of headphones is a good balance. 


Troy
By Troy in Articles ·
Articles

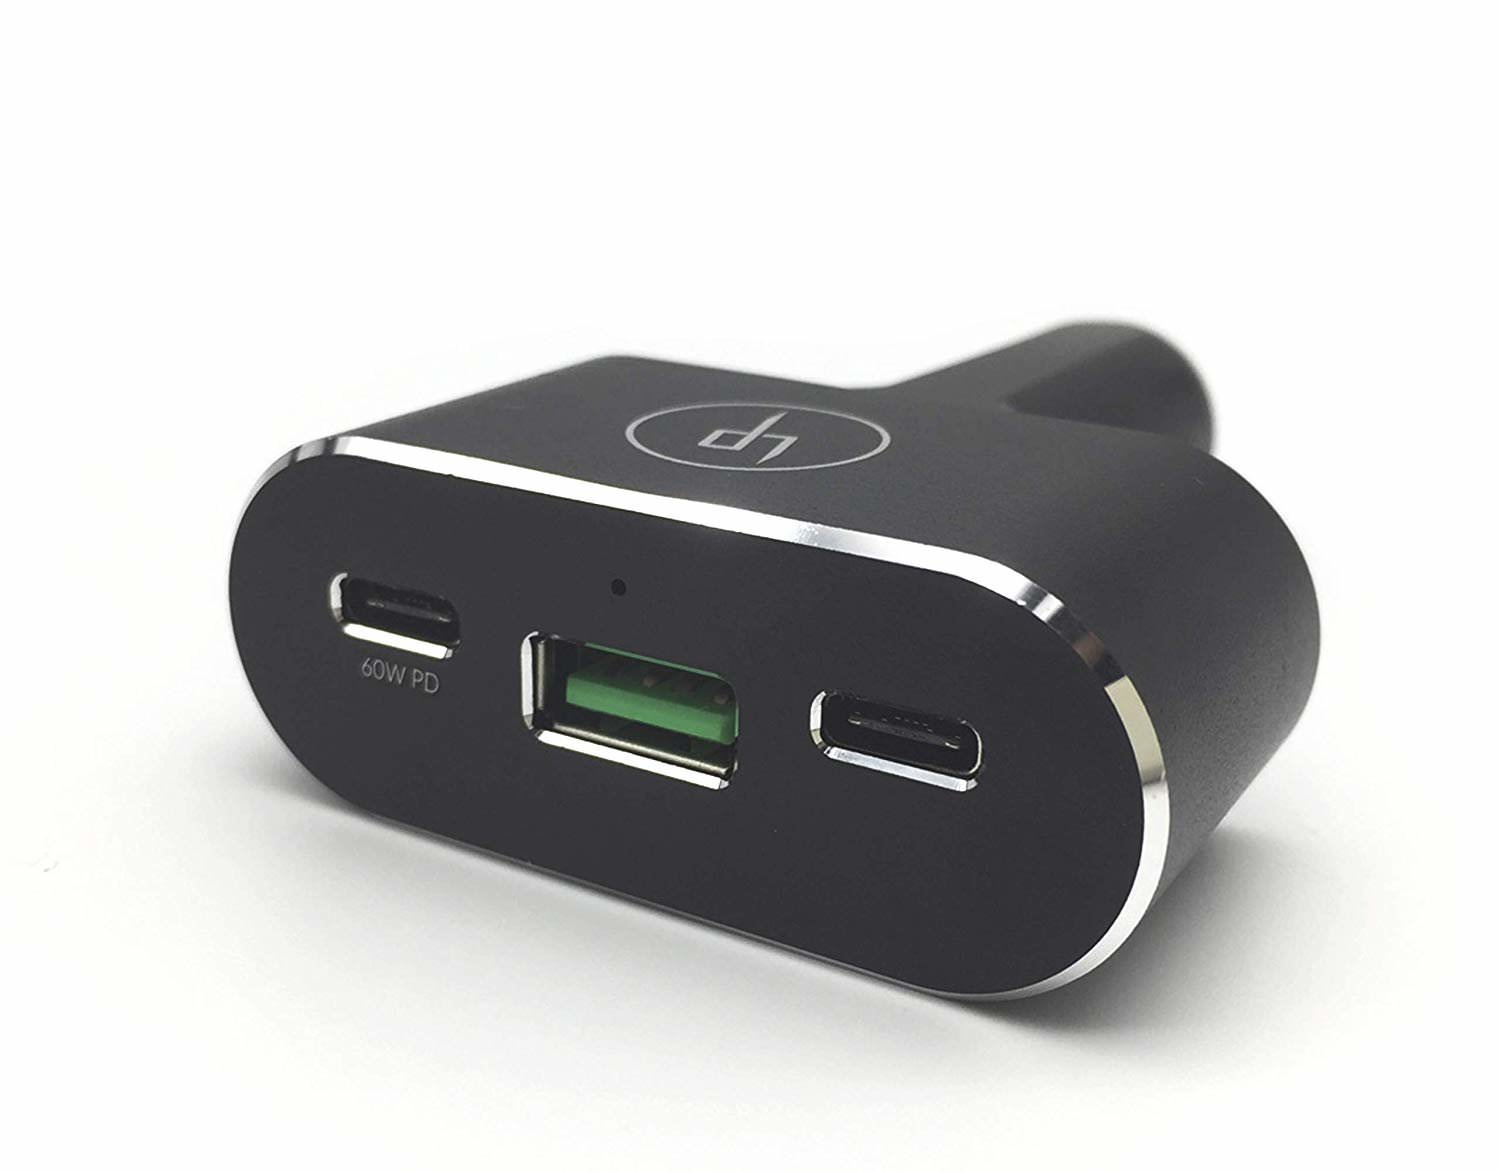
Lifepowr TP96 Car Charger damaged my MacBook Pro 16

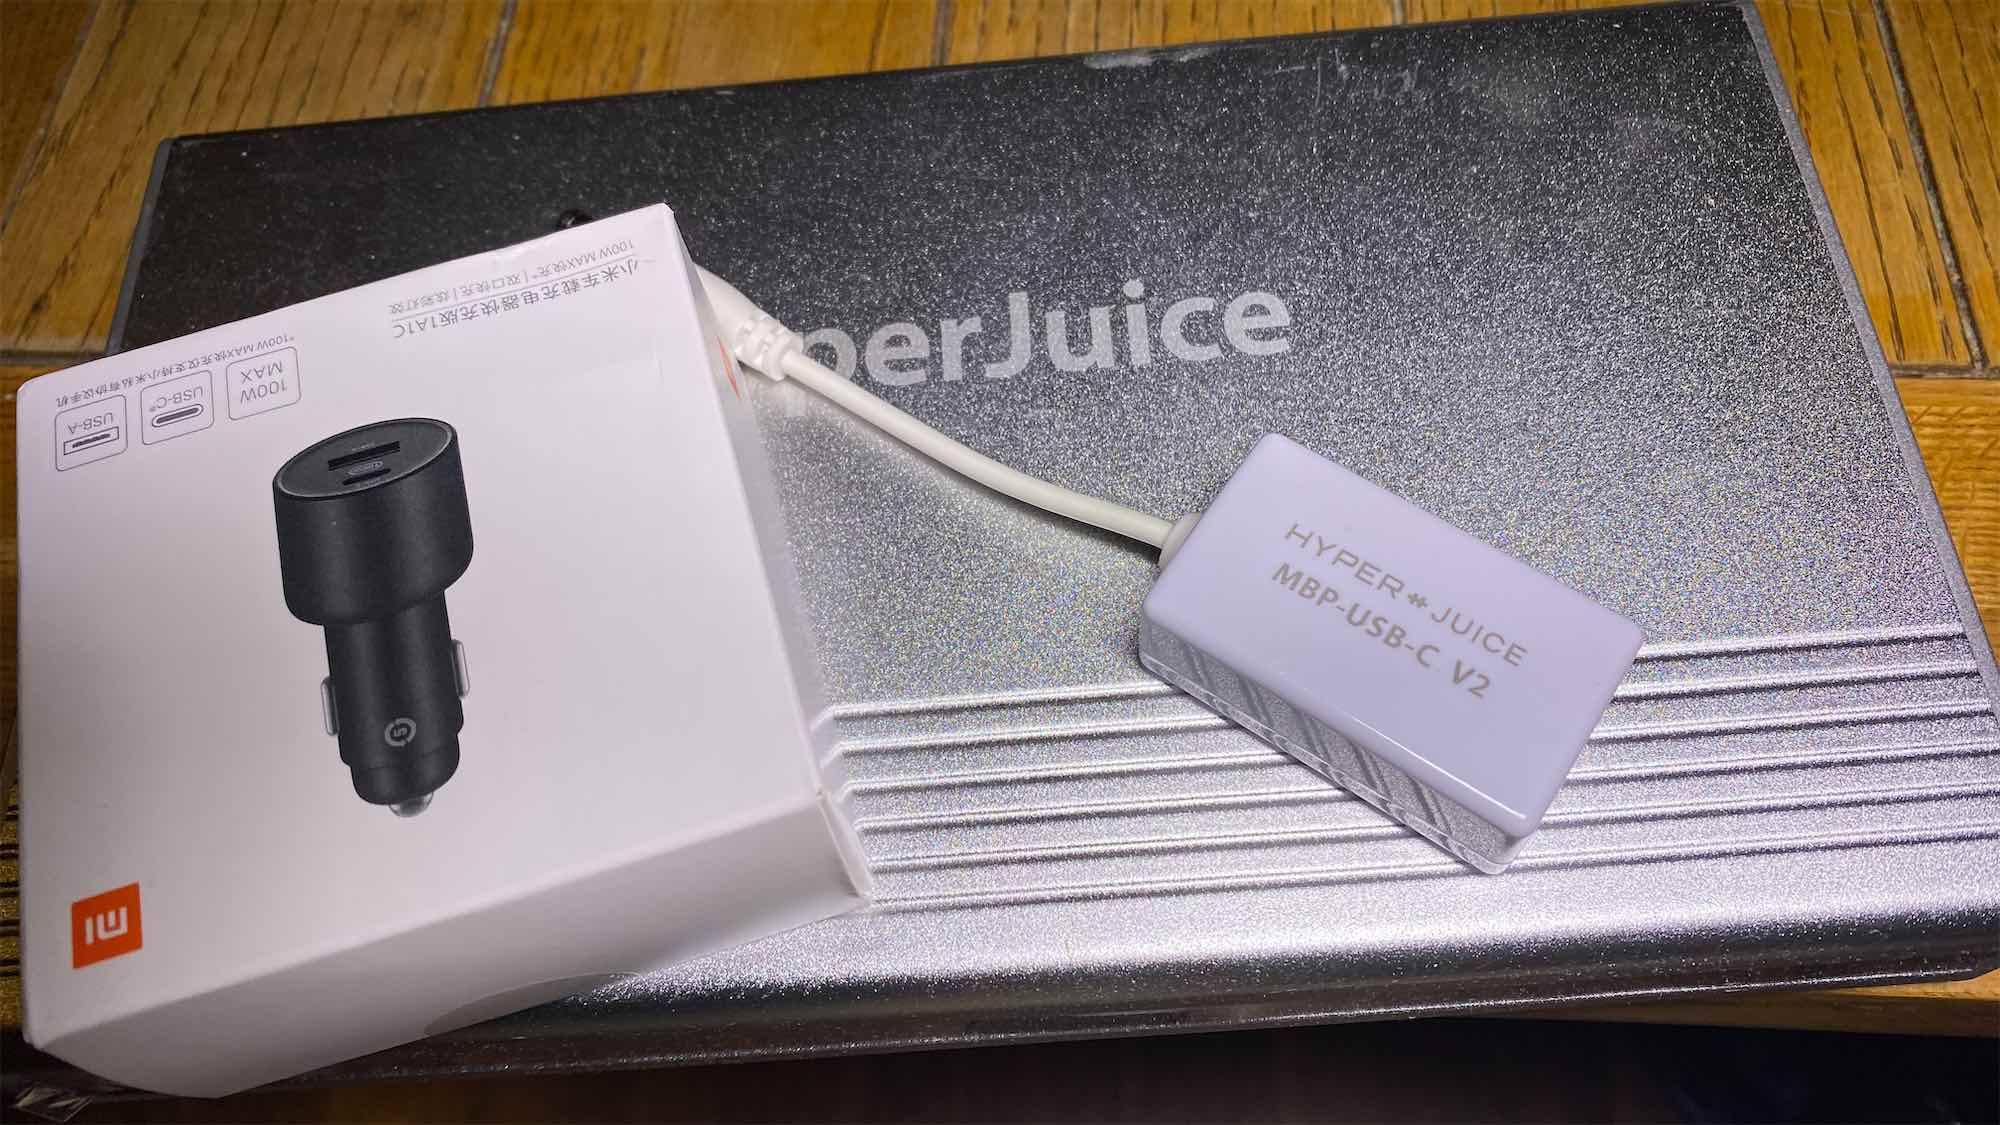
I was in need of a car charger for my MacBook Pro 16 2019 model. I bought a Lifepowr TP96 Car Charger. After connecting my MacBook pro to this charger, it has damaged the charging hardware in my MacBook Pro, which I will need to take to apple to replace the MacBook logic board. The issues are: 
1. When there is no charging cable connected to the MacBook USB-C port, the MacBook is displaying "Power source: Power Adaptor." 
2. When I connect the USB-C charger to the MacBook, it takes 5 seconds before it starts to charge. 
3. I no longer hear the "tong" notification sound when the USB-C charge cable is connected to the MacBook.

 
Be warned. Do not plug your MacBook pro 16inch to a Lifepowr TP96 Car Charger. It will damage it
Troy
By Troy in Articles ·
Articles

The Lifepowr A3 MacBook pro power bank tear down

The Lifepowr A3 MacBook pro power bank specifications are listed as a 27000mah power bank with a USB-C output at 87watts.
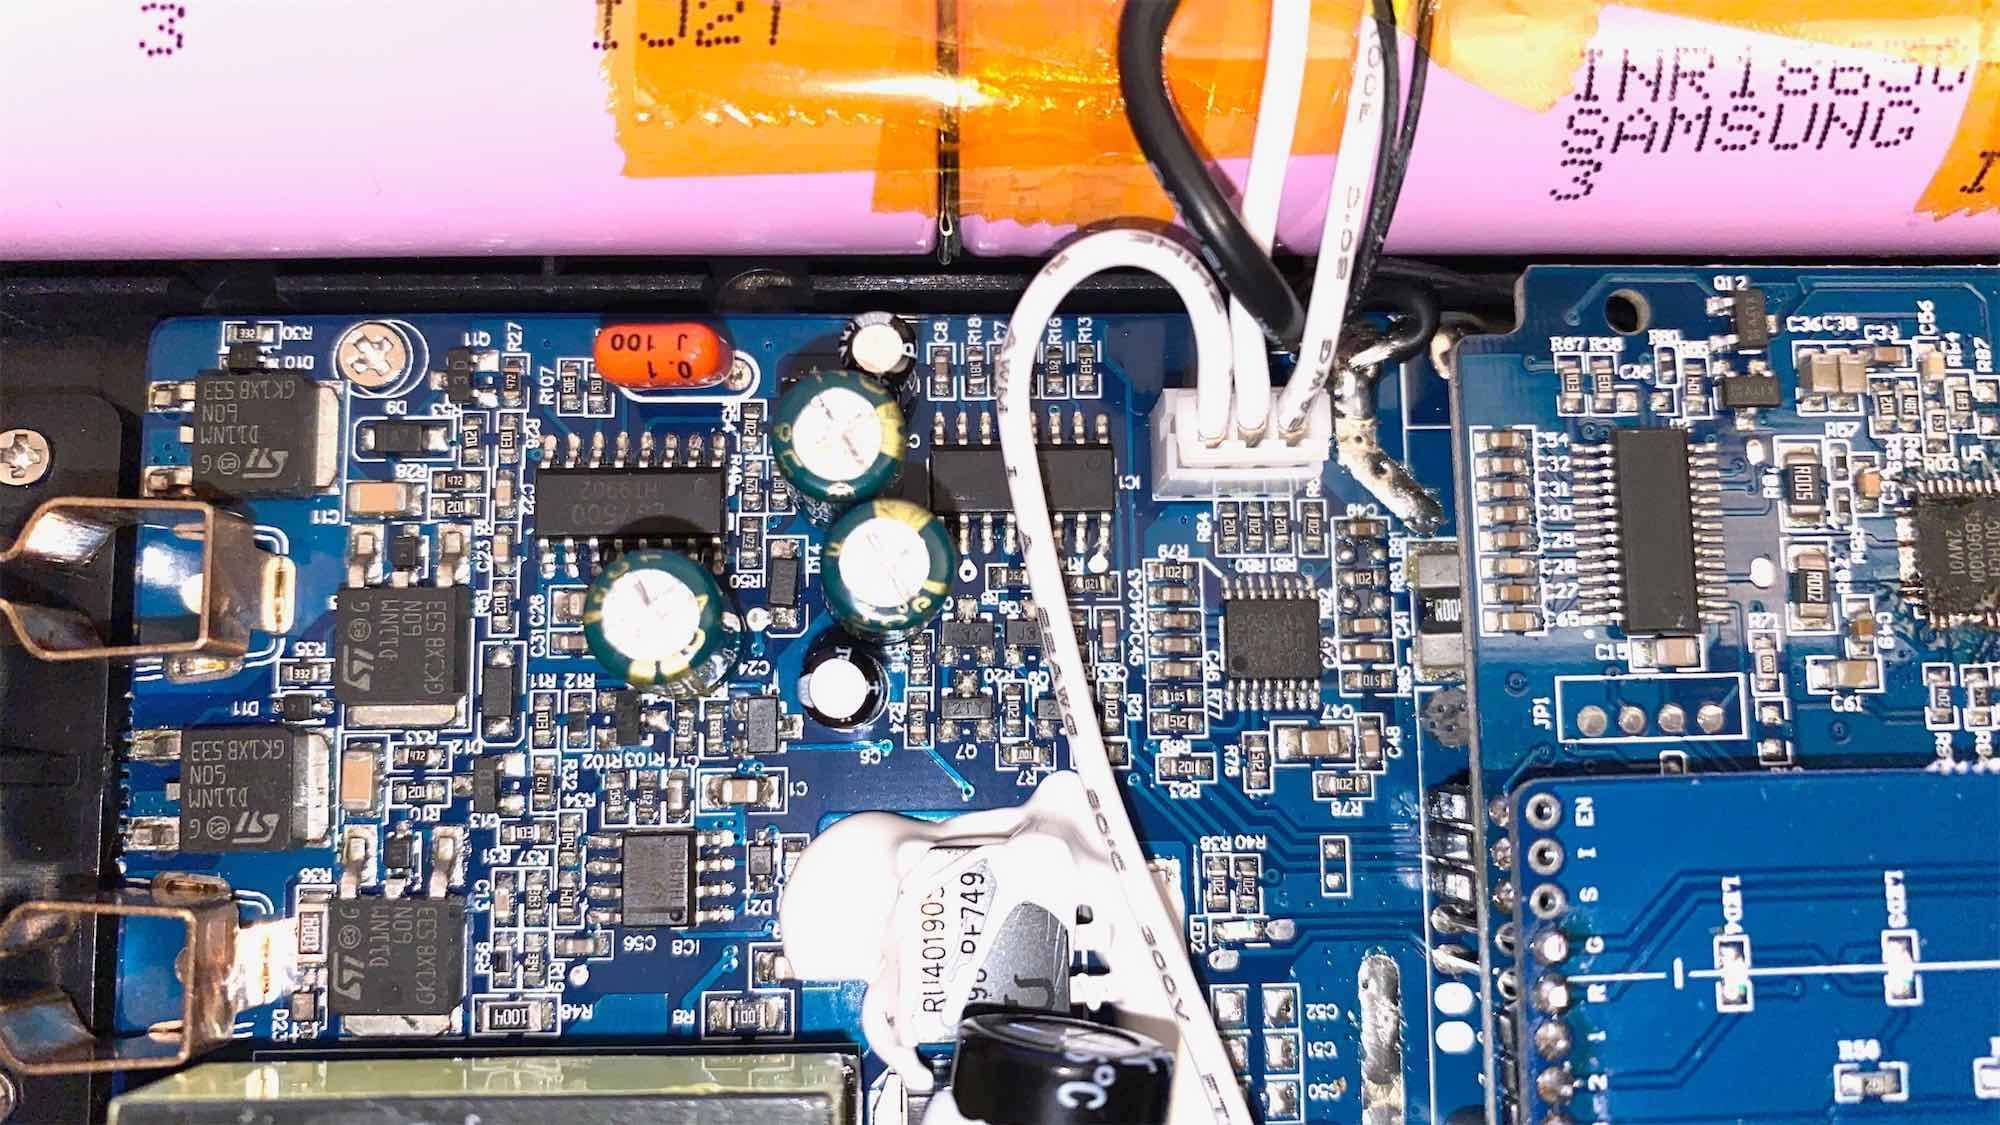
After receiving a Lifepowr A3 MacBook pro power bank, I opened it up to see what's inside. There are 8 Samsung INR18650-35E, 18650 batteries combined, which equals to 28000mah output.

The INR18650-35E specs are  Official specifications: Nominal capacity: 3500mAh Minimum capacity: 3350mAh Nominal voltage: 3,6V - 3,7V Charging voltage: 4,2V Discharge current: 8A Maximum discharge current: 13A Charge current: 0,6C 2000mA Discharge end voltage: 2,65V Pluspol: FlatTop Chemistry: LiNiCoAlO2 Diameter: 18,55mm ± 0,1 Height: 65,25mm ± 0,15 Weight: 48g ± 1  
Photos bellow

Troy
By Troy in Articles ·
Articles

Upload Photos To Instagram FREE! From Your Mac Or Windows PC Using Web Browser

Do you want to upload photos from your Mac or Windows PC for free with no hassle?
The simplest method is to use the Vivaldi web browser.
 
Download  Vivaldi
The super-customizable web browser Vivaldi offers the quickest and easiest way to upload photos to Instagram from your PC or Mac. It runs the mobile version of Instagram's website in a web panel.
Download and install Vivaldi, then either run through the wizard to import bookmarks and set your preferences or click 'Skip all' to continue with the browser's default settings.

Create a web panel
Navigate to www.instagram.com, then click the plus icon (Add Web Panel) on the left-hand side of the browser interface. The URL will be filled in automatically, so all you have to do is click the plus again.
The mobile version of Instagram will now appear in a sidebar on the left-hand side of the browser and will stay there as you browse other sites. Log into your account, then resize the sidebar until the mobile site fits in comfortably.

Upload to Instagram
Click the plus icon at the bottom of the website to choose a photo from your PC or Mac, add a caption and tags, and upload it to your Insta account.
 
 
Troy
By Troy in Articles ·
Articles

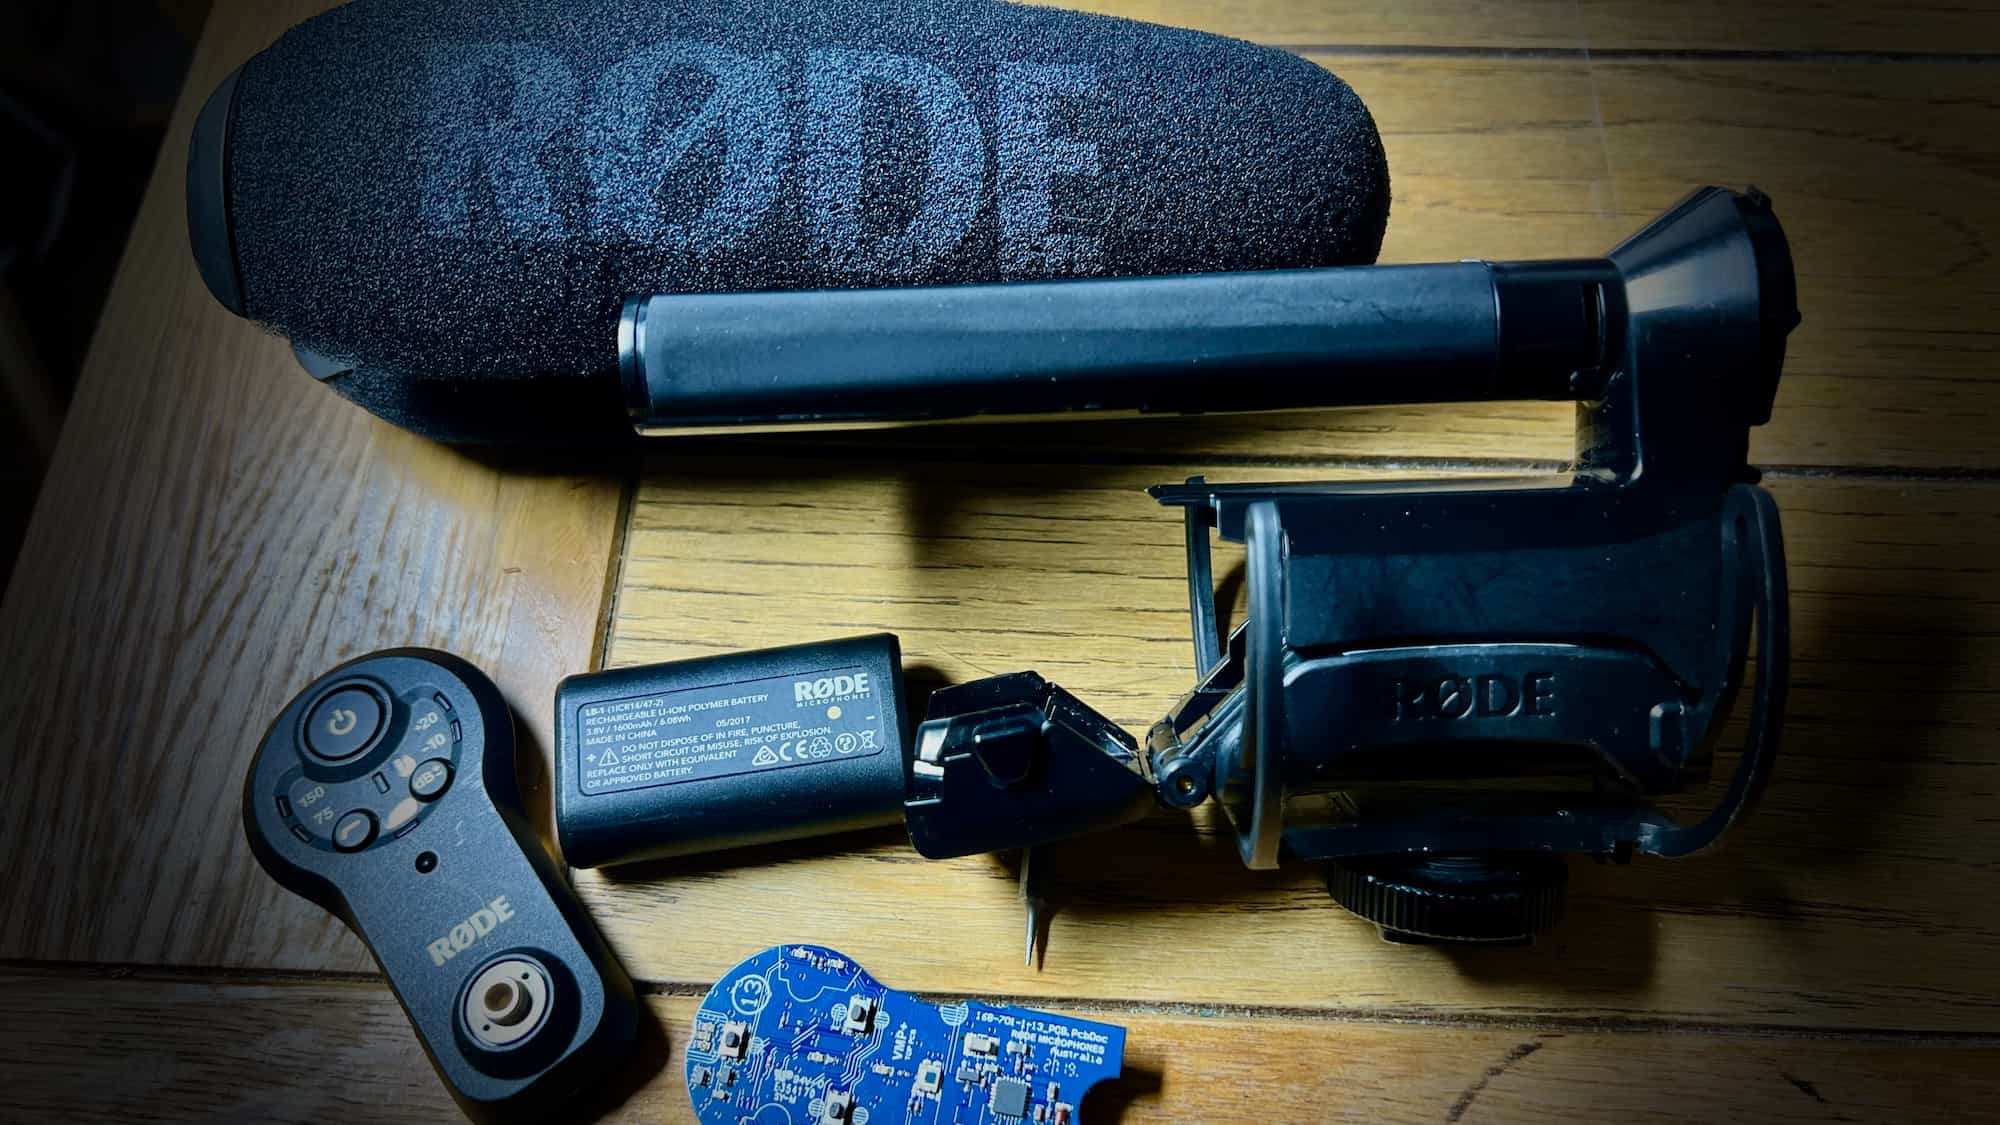
Rode Video Mic Micro Bouncing Quick Fix "Mod"

A quick fix deserves to a quick write up.
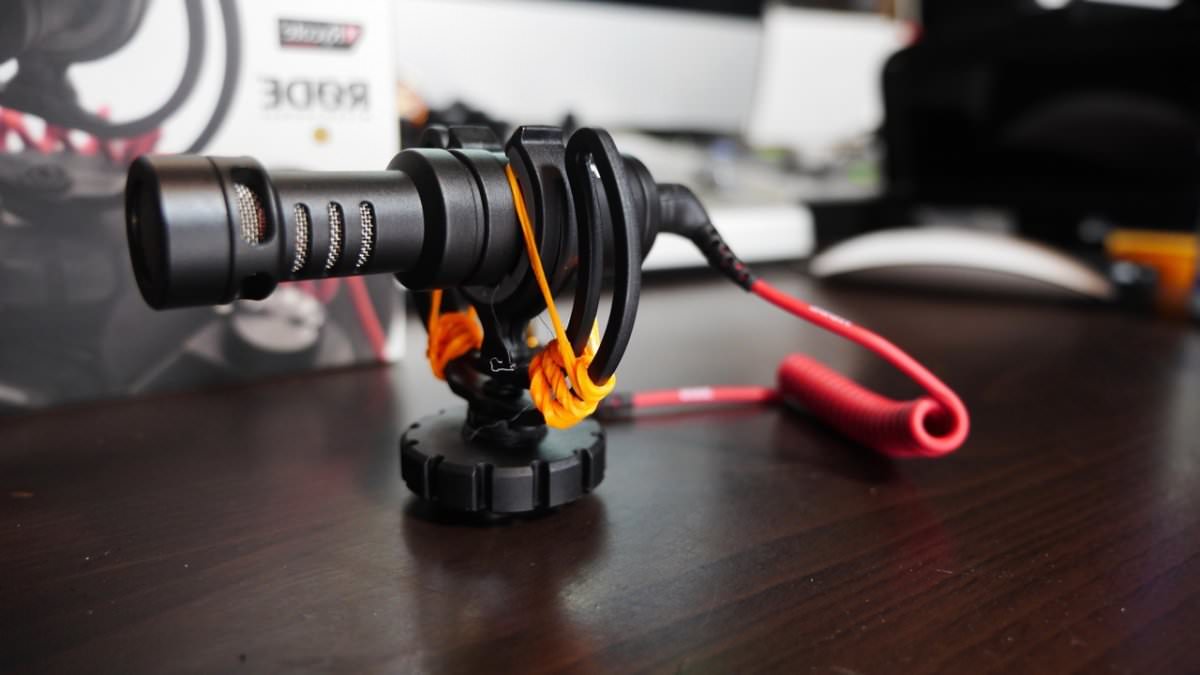
As we all Know the Rode video mic micro is a great microphone, except for the flimsy mic mount. For a quick fix, all is needed are some rubber bands wrapped around the antivibration mount, which will cut down some of the bounciness.
 
The fix
10 loom bands. loom bands are rubber bands kids use to make various arts and crafts. Check with your kids as they might have some.
Wrap 5 bands around each side of the mount, job done.
Check out my vid on the Tube for a hands-on illustration.
If you guys and gals come up with a better fix please let me know.
I’m always seeking ideas to help improve the stuff I already have.
I also hope Rode take a note and improve this in their next release.


Troy
By Troy in Articles ·
Articles

How To Hack Apple Mac EFI Bios Firmware Password On A MacBook Pro 2011

If you're reading this, I'm guessing you yourself is on a mission to remove an unknown bias password from a Macbook pro.
I'll start off with the tools you will need in order to spare you the read


Tools needed.
A sop 8 chip programmer with a sop 8 holder or pin connectors. ( I use the True Wellem USB chip programmer acquired some years ago back in my Xbox 360 hacking days). A hot air rework station, or a soldering iron with soldering wick and a razor blade. A hex editor software. (I use the Synalyze it Pro Hex editor on Mac). Hacking an Apple MacBook pro bios security chip may seem sinister in some cases, however, there can also be a legitimate circumstance whereby the owner forgot his password and do not have the original apple receipt in order to access the bios lock recovery from Apple Inc.
Before I get into the nitty-gritty of the how-to.
The 2011 MacBook pro was one of Apple's greatest creation aside from the major graphics card issues with this model.
Many large live productions shows are still being powered by a Macbook pro-2011 in the year 2019. 
Some of the pros are.
i7 processor, option to upgrade the ROM, the option to install a standard SSD drive, and the option to remove the CD drive then install a second SSD drive.
 
The Hack.

Remove the Bios chip for the logic board 


Place the Bios chip in your chip programer.


Read then Dump the chip code.


Open the chip code in your hex editor and search for "pN" or what ever gibberish is on the photo above. The line is located at the bottom of the chip code.


Select it all and change the gibberish to hex: FF


Then Dump the edit code back to the bios chip.


Re-solder the bios chip back to the MacBook Pro Logic board.
If all goes well you should have a MacBook Pro with no more Bois Password.
 
If you need more help doing this Hack, feel free to drop a comment.
Happy Hacking.
Troy
By Troy in Articles ·
Articles

How To Replace Vauxhall Insignia Oil Pickup Gasket, Insignia Low Oil Pressure Warning Fix,

How-to replace oil pump pickup gasket for Vauxhall Insignia, Opal Insignia .
The method for replacing the gasket on a manual transmission and an automatic transmission is almost the same. All the automatic transmission insignia cars have a pre-cutout on the transmission box to remove the two Torx bolts without rotating the engine's flywheel.
Insignia low oil pressure warning.
 

Replacement oil pickup gasket
 

Holes cut with a drill to gain access to two bolts.
 
Some manual transmission insignia cars have the pre-cutout on the transmission box to remove the two Torx bolts, while some manual transmission insignia cars do not have this cutout and you will need to undo the transmission gearbox from the engine or drill two holes in
the transmission gearbox to gain access to these two bolts.
 

Oil Pump with gasket 
 
Extra non-standard tools needed
1. 32mm socket and a breaker bar use to remove the driveshaft big bolt.
2. A SLIM 150mm Long T40 magnetic star torx screwdriver bit is used to remove the 2 T40 torx bolts located on the transmission side. (This can be found on eBay under "Hakkin 8pcs S2 Steel 150mm T8-T40 Magnetic Extra Long Star Torx Security Screwdriver Bits Set."
3. A chisel for breaking the engine's sump from the engine block after removing all bolts.
 
Parts needed for this job.
1. Engine oil.
2. Oil filter
3. Some transmission oil.
4. Sump gasket. part number: 55589549
 
This task is not difficult and can be done with a standard car toolkit and a few extra tools.
In this video, I started at 11 a.m. and finished at 6 p.m., with many tea breaks and taking my jolly slow time. Good luck.
 
Troy
By Troy in Articles ·
Articles

IPHONE ANAMORPHIC SETUP, MOONDOG LABS, HELIUM IPHONE CASE AND RODE VIDEO MIC MICRO

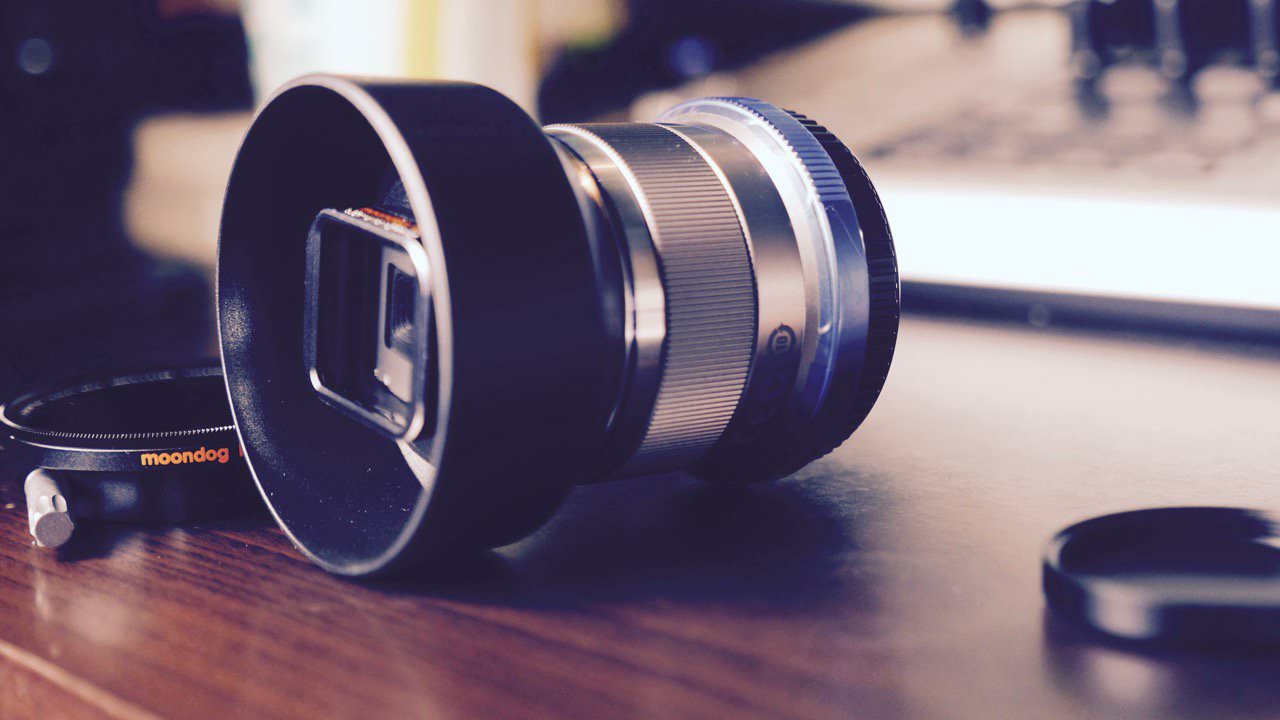
Yep’ I’m still riding the Anamorphic wave. I got me a Helium iPhone case and a Rode video mic micro to top it off. The Helium case is top-notch, its made from full alloy metal. As I said before “I likes meee metals”. The Helium case has a 37mm threaded lens attachment incorporated in the phone case, which gives a direct fit for the Moondog labs Anamorphic lens adapter. The case has mounting points all around, which is great for mounting various accessories. Example, a mic, lights, a handle, a selfie stick, mounting to a tripod, or anything else that needs mounting. The craftsmanship displayed in this iPhone case is spot on, I’d say perfection. The phone fits snugly in the cutout. One of the features I like is the thumb screws for installing and removing the mobile phone, quick and easy. The Rode video mic sound quality is great, Rode creates very good mics. My only fault with the Rode’s video mic micro is the vibration isolation mount. The mount is a bit flimsy, which makes the mic bounce up and down when walking. A quick fix of mine sorted the bouncy problem. By using some rubber bands known as Loom Bands, wrapped around the mount, I was able to cut out most of the bounciness. The Moondog Anamorphic lens adopted is great, its worth every penny. All in all, these are great products and I highly recommend them to anyone seeking to explore Anamorphic filming. check out my blog post about modifying the Rode video mic micro for damping the bounciness.
Also, check out my vid on the tube below.


Troy
By Troy in Articles ·
Articles

Propagating Plants

There are many reasons to propagate plants, such as taking plant cuttings. Some of the reasons are.
Cost: It is cheaper to propagate a few plants from what you already have than to purchase new ones.
Plant life expectancy: Many perennial plants live for a few years and then die. Taking cuttings from those plants extends the species living in your garden.
Multiplying the breed: If you have only one type of a specific plant in your garden, you can take cuttings from the mother plant and multiply the breed.
The good feelings: One of the greatest feelings as a gardener or hobbyist is to see a plant develop from seed or cut into a beautiful spender from the likes of your doings. Those are only some of the reasons why it’s good to propagate plants.
 
Propagating plants is not complex. Many plants can be propagated simply in your home or garden with no effort.
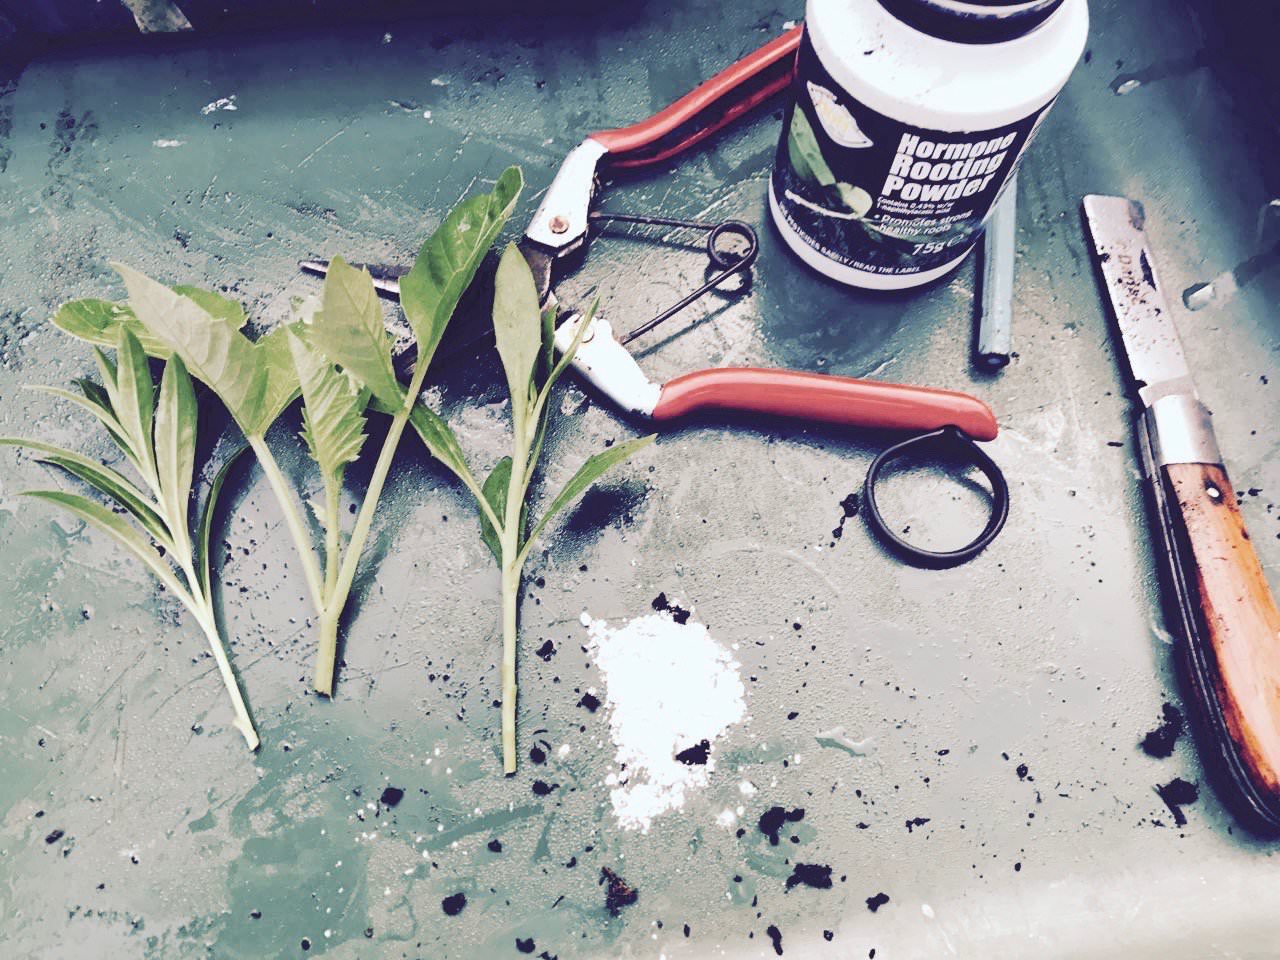
I’ll jot down what works best for me as a hobbyist gardener living in London, UK. Through the years, I’ve experimented with propagating various plant types. At first, many of my cuttings would not root; they’d dry up. I learned that when cutting, it's best to take a cut from a new growth section from the mother plant. Cut a green and soft stem, which has not yet developed into a woody stem. Since doing that, 99% of my cuttings have always roots. Many plants will root by inserting the cutting in moist compost or a water container. Dipping the cuttings in hormone rooting power makes the rooting process much faster.


The process
Start by using a clean plant-cutting tool to collect your cuttings.
Take cuttings that are green, soft, or not mature yet.
New growth shoots are best. Here in London, I noticed the plants pop out new growth twice yearly, once after the winter, around April May, and later in the year, around July or August.
Remove leaves and stems from the bottom of the cuttings. You want to create a clean stem to stick into the compost.
Wet the cuttings, then dip them in some rooting powder.
Pop them in the compost, then compress them around the base, making them slightly tight.
Pour some water onto your new potted cuttings.
Let it sit for about three weeks in a nice warm spot, away from direct sun.
One important thing is to make sure the compost is moist/wet all the time. In about three weeks, you’ll have some nice cuttings from your mother plants ready to re-pot or spread out in your garden or indoors.


In the photo above, those cuttings were taken from a daisy mother plant. After three weeks, they’ve popped out nice, fresh, healthy roots ready to be re-potted or planted in the garden.
 
 
Check out my video, which illustrates how I propagate plants here in London, UK.
That’s it, nothing much to it.
Happy propagating.
 
Troy
By Troy in Articles ·
Articles

Creating a Brass hinges for a Constantine lighter Movie size

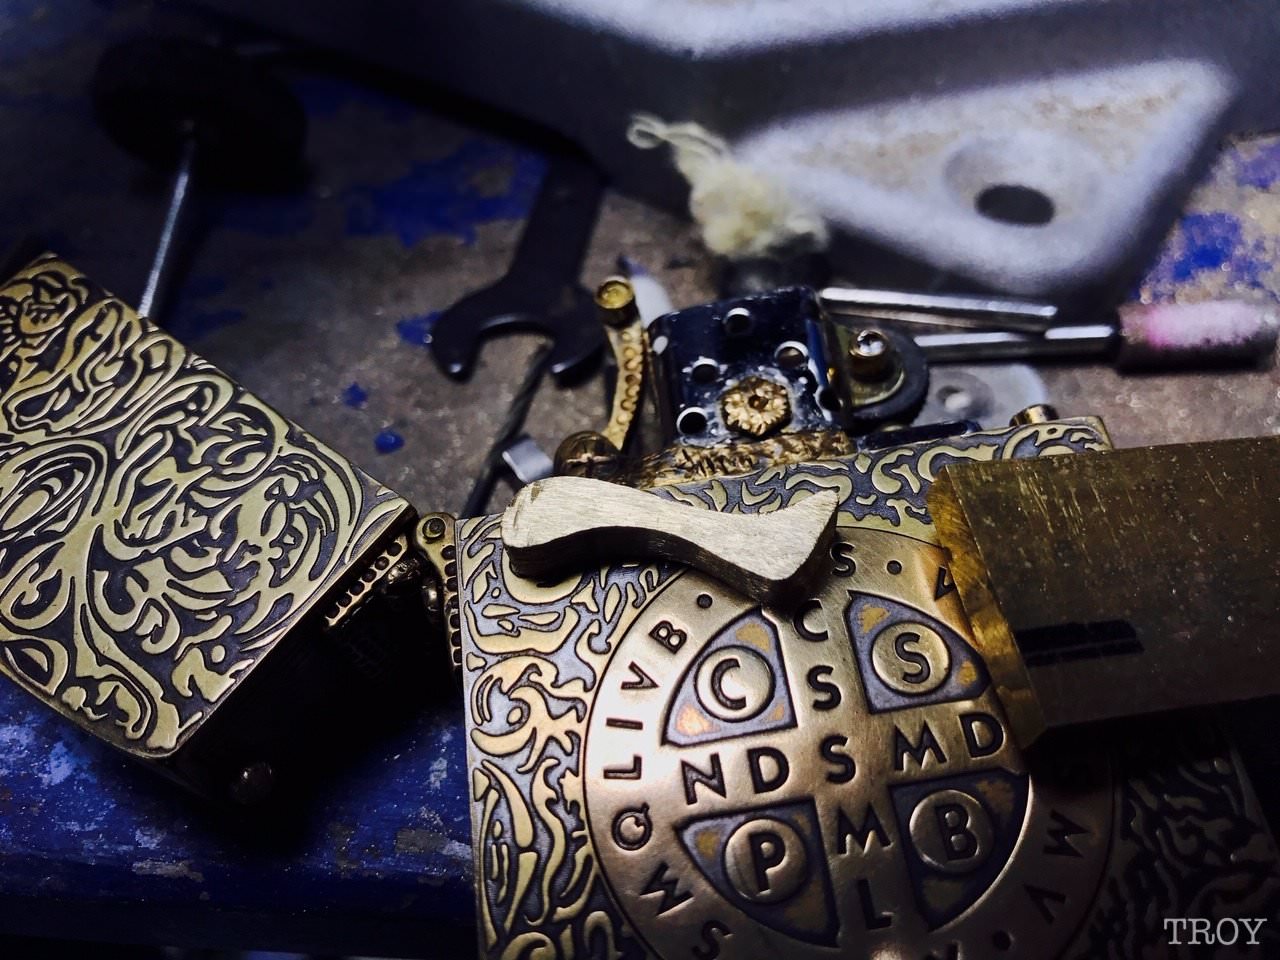
The first hinges on my lighter broke, it was thin and not strong enough. This time around I thought I'll create a much thicker hinge from a bit of bass bar. The best way to create the hinges would be to use a CNC milling machine, which would need to be programmed and tested. I chose to create the hinge from the eye with a Dremel tool. Plus, it's great fun creating things with the eye without using a machine.


I started off by tapping bigger threads for bigger screws.
 

The brass bar I used to create the hinge.
 

Measured and cut the bit I will use.


Measured and mark both sides of the brass metal hinge using a sharpie and a razor blade 


After some Time I had both sides groove cut outs and fitting spot on.


Grinding and milling to the size I need.


Riveted up and seems ok.


After one day I completed the hinges, installed a patina.


Engraved my name on the back.


After creating the hinges I created a bigger close hammer for the lighter lid.
Troy
By Troy in Articles ·
Articles

Macro photography in the garden with Olympus 60mm f2.8 Macro lens, GH5

The warm London weather is late this year.Last year at this time it was nice and hot.
Nonetheless A bit of macro in the garden, snapping up all the insects who're on a Friday's evening lounging is always a great treat.
A photo of a Dragon fly relaxing on a bit of Ivy leaf.
Before and after filter from Apple photo app.


Troy
By Troy in Articles ·
Articles

Why I will never buy Weber BBQ again

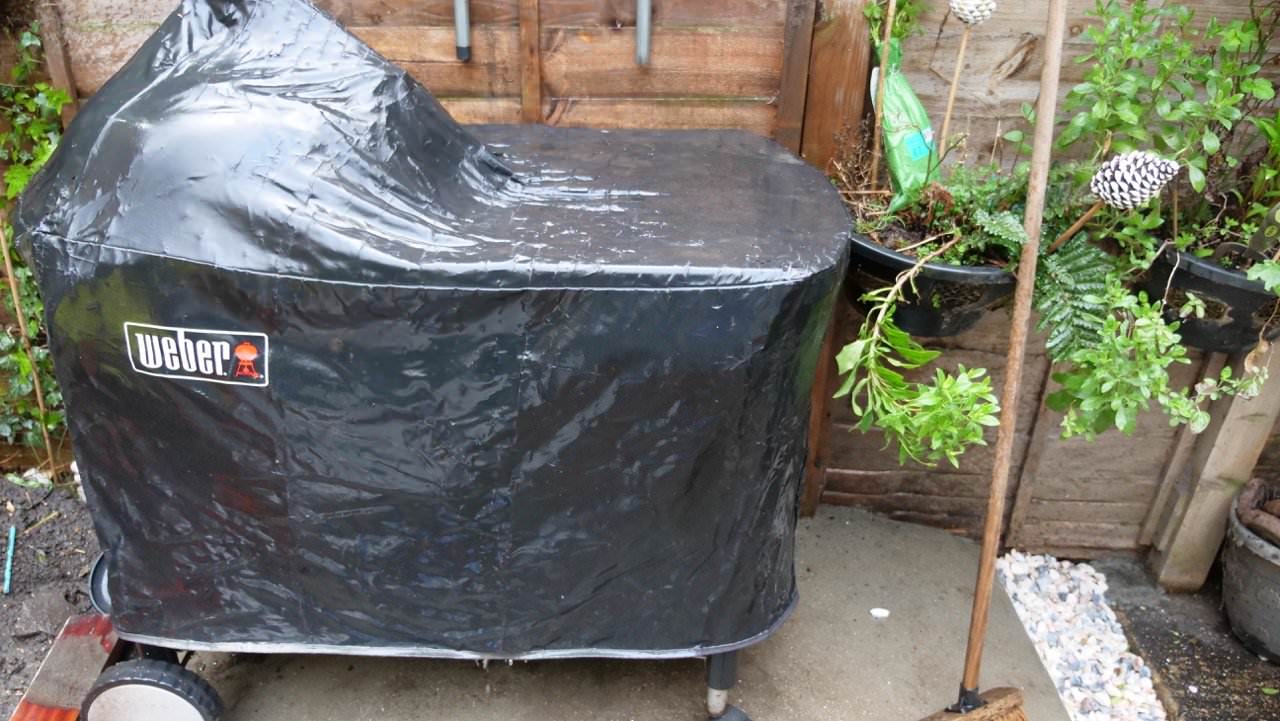
I bought a Weber Performer in 2016 to upgrade to a much bigger BBQ with a more modern look. I was hoping to buy one that would last forever. I also purchased the Weber cover for the BBQ. After one year, the Timer stopped working, and the BBQ cover deteriorated. Due to my busy life, I never contacted Weber regarding the warranty. In 2019, the BBQ table broke. I thought that was enough. I searched to see if other folks had the same issues. Lo and behold, the Weber Performer plastic table was breaking both lefts and rights all over the world. I read some folks got a free metal version replacement from Weber. I contacted Weber UK, who told me the plastic table only has a 2-year warranty. I had to say to the Weber UK customer service agent, no' on your Weber website, it states all plastic parts have a 5-year warranty. In the end, Weber replaced the performer plastic table with a metal version, the BBQ cover and the one-touch cleaning system for free. I was told the rusty frame and the faulty timer only have 2 2-year warranty. Weber UK said I would have to buy the timer for £19.89. 
Will I ever repurchase a Weber BBQ? Hell NO!! 

This BBQ is not weather-sealed, and whatever paint Weber uses is not weatherproof. The timer will stop working in one year.
My Weber Performer shows signs of rust.
Weber sells expensive items that are cheaply made in China.
Why should I pay over £400 for a BBQ and then, in less than three years, have it become a rust bucket with a broken table and a faulty timer?
Live and learn. 
Stay away from Weber BBQ if you live in the UK.
They are Rust Buckets. Cheap China-made RUBBISH.
 
 The Weber Performer BBQ cover cracked up after one year of use.


 Broken Plastic Table 


RUST BUCKET Weber proformer almost 3-year-old, sitting outside with a Weber BBQ cover.


The Replacement parts I received with a new metal table but no timer.


Troy
By Troy in Articles ·
Articles

Old Build Hexa-Copter (aka Drone) 2011

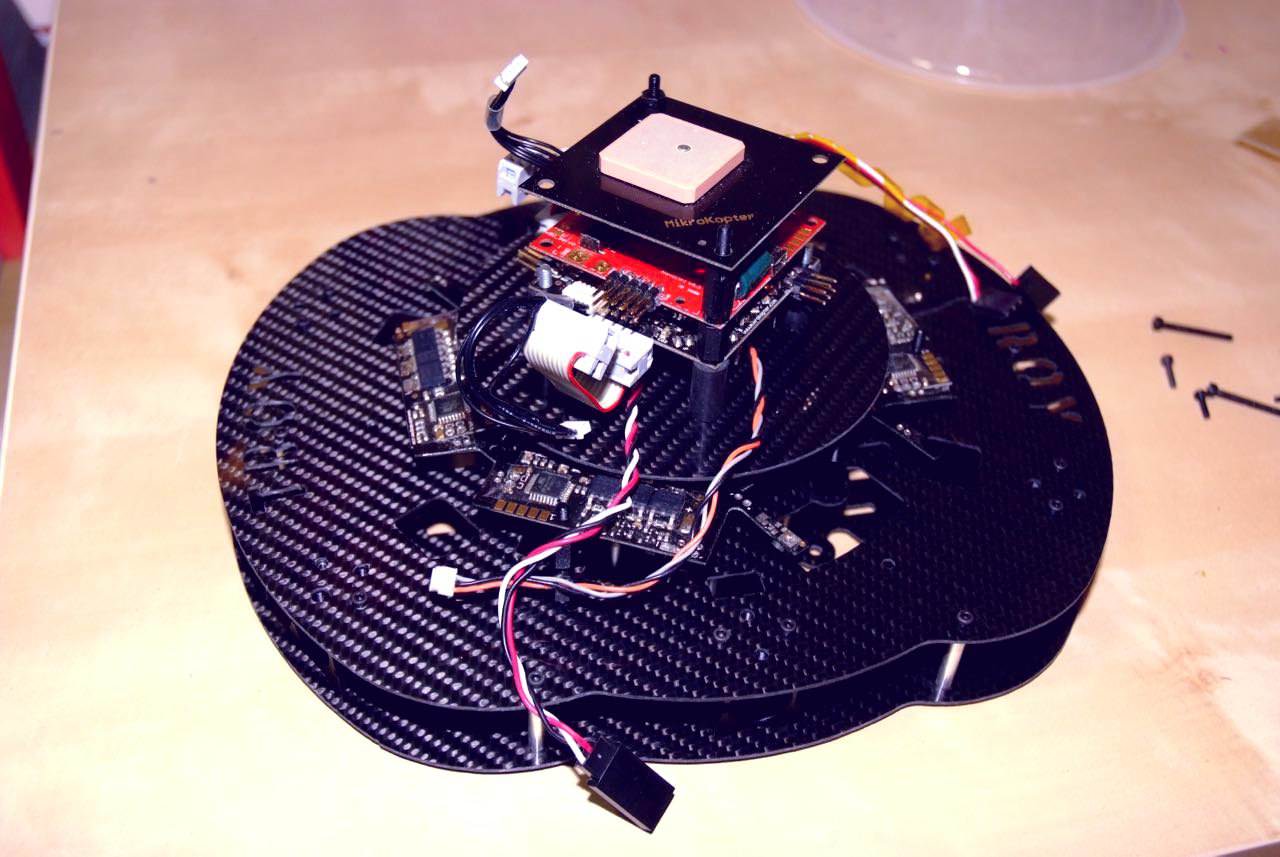
Sometime ago back in 2011 long before domestic drones were popular and couldn’t be bought ready-made off the shelves, I created this hexacopter. It was based on electronic parts sourced from Germany. The copter frame I designed using AutoCAD, then fabricated it from carbon fiber material using my trusty little homemade CNC machine.
I gave the copter the name “TROY” Troy the Trojan, as in the very unpredictable free-spirited one.


This was probably my 10th build. I had gained a lot of experience from the previous builds years before then. Those long and sometimes frustrating days. Thinking, creating, coding, testing, and then reporting back my data and findings to the open-source community. One major issue I had back then was the overheating of the motor's electronic speed controllers. They would overheat under load, which would cause instability to the copter’s system performance. I came up with the idea of installing a fan below the ESC, which did work. it kept the temps down. In the end, that copter flew very great, top of its class as a HexaCopter created in East London.
Check out my video above and the images below.
Don’t stop creating.


Troy
By Troy in Articles ·
Articles

Moondog Anamorphic Lens Adopter Unboxing "The Anamorphic Craze"

There’s an Anamorphic craze going on in the indie and hobbyist videography realm. What is Anamorphic? well’ Anamorphic is a method used by the movie-making industry, which was only available to them once upon a time in Hollywood due to the cost of the equipment. Little by little small companies are creating affordable Anamorphic lenses and lens adaptors for the growing indie and hobbyist videography market. Moondog and BeastGrip are two of them. They created Anamorphic lens adapters for mobile phones, which can help to translate standard mobile phone footage into a cinema-like look. I rode the Anamorphic wave and got the Moondog version. It’s A great bit of kit, precisely engineered and manufactured from Alloy metal. Yep, I like meee metals. I’ll be testing this Anamorphic lens adopter out in the coming days. check out my unboxing vid on the tube below..


Troy
By Troy in Articles ·
Articles

How To Repair A Mackie Big Knob Power Supply

The Mackie Big Knob monitor control power supply repair.
The symptoms before my Mackie Big Knob died were, humming sound in headphones, slight vibrating noise coming from the knob. A few days after it died, no lights, nothing, no life.
This isn’t a full in-depth tutorial. It’s more like a Brain Sparker to spark the DIY element in yourself to let you know you can repair your Big Knob without the need to pay Mackie £300 to repair it for you.
 
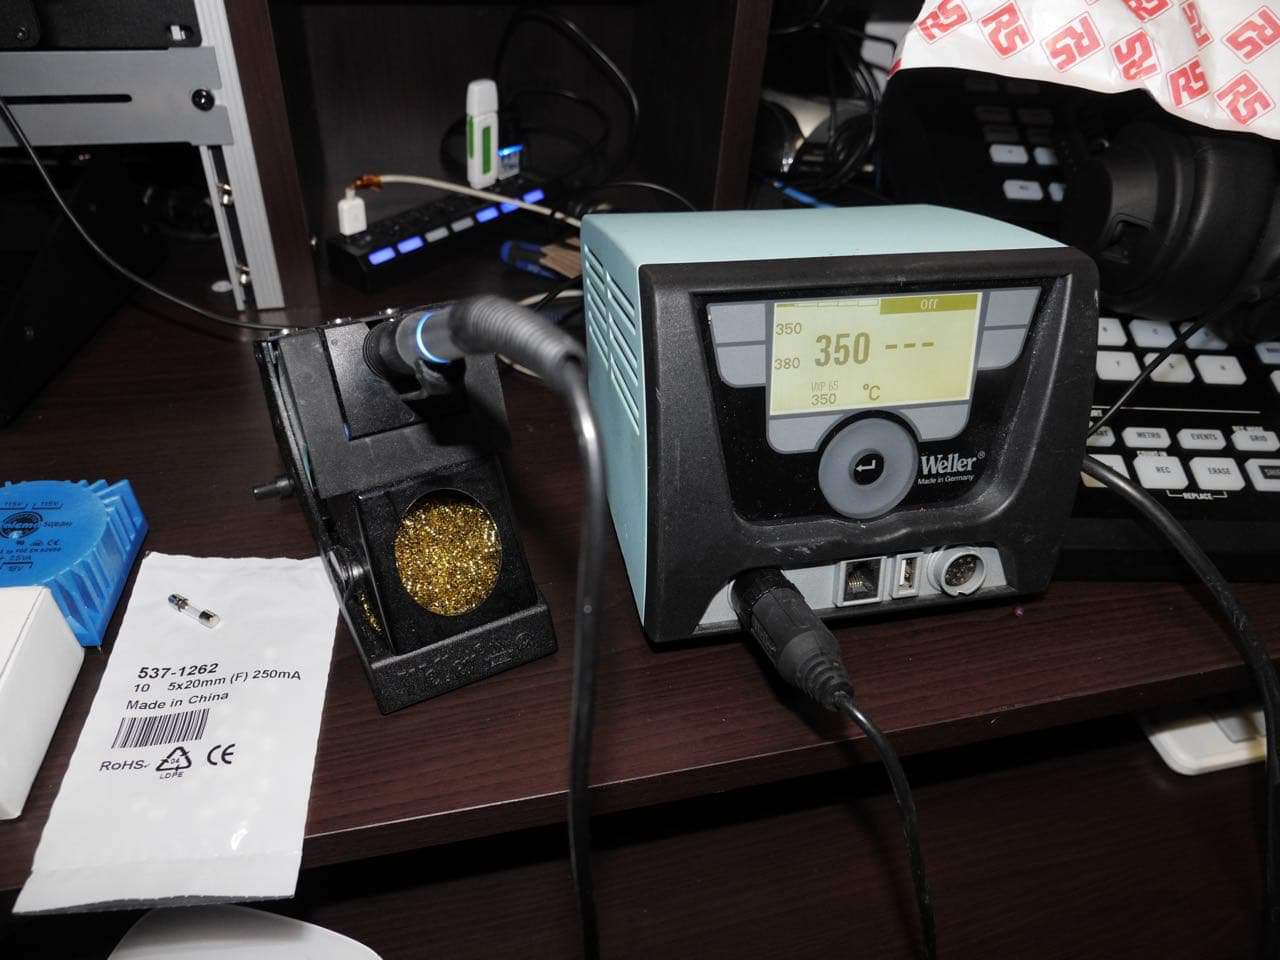
All you needed to repair the unit is, a multimeter, soldering iron, soldering wire, soldering wick or soldering suction tool to remove the faulty power supply from the circuit board, some screw drivers, the replacement parts and some gentle time.
Here in the UK the replacement power supply transformer and fuse can be purchased from RS Components.
Transformer part number is: 2239351 (cost £14.69)
Fuse part number is: 537-1262 (cost £1.95)
For the rest of the world, copy the parts specification from RS Components website then search for them in your local electronics parts supplier.
 

The power supply board looks cheaply made, with a green clad board. It looks very different from the rest of the other circuit board which is blue. The dead power supply transformer was made in China, while the replacement from RS Components was made in India.
 
The Steps

Remove the screws from the Knob/take it apart. It’s very straightforward. Unplug the power supply’s output cable (the cable which has three white wires and one black wire).


Unscrew the power supply circuit board from the Knob’s housing. Remove the dead transformer by using a solder sucker or soldering wick then place and solder  the new transformer onto the circuit board.


When all is done and you’re satisfied the new power supply transformer is installed correctly, with the power supply board not connected to the main board. Power up the unit by plugging the kettle lead to the unit then to your power outlet, check the power supply circuit board’s output connector with your multimeter by setting your multimeter to DC volts. Place your multimeter’s Black probe onto connector "DGND" and your Red multimeter probe onto connector "+15.5V". If your multimeter reads a voltage between 15volts and 17volts all is fine. Do the same for the other two connectors, "AGND" and "-15.5v". You can also diagnose if it’s your power supply transformer at fault by doing this multimeter check before you purchase the parts.


If all goes well as it should, screw the unit back together and enjo y your Big Know for some more years. Many folks do not like the knob, I don’t know why. Maybe it’s because the Knob is too big. Many Platinum records out there were referenced through a Mackie Big Knob. Goes to show the Knob is a very great tool if used correctly. I hope this tutorial will help you to repair your faulty Mackie Big Knob.


If your Knob is dead don’t bin it fix it.
 
Troy
By Troy in Articles ·

All Articles

Popular Members

  1. hassan77h
    +hassan77h
    27
  2. Troy
    Troy
    22
  3. uglyoldbastard
    +uglyoldbastard
    13
  4. regloops
    +regloops
    8
  5. GM-Enthusiast
    +GM-Enthusiast
    7

New Members

  1. David Fontenot
    David Fontenot
      Member
    Joined
  2. SSAUTOZ
    SSAUTOZ
      Member
    Joined
  3. valdemarford
    valdemarford
      Member
    Joined
  4. Course faycal khalil
    Troll-Course faycal khalil
      Troll-Troll
    Joined
  5. Troll stevie nick
    Troll-Troll stevie nick
      Troll-Troll
    Joined
  6. Troll Parkerchevy
    Troll-Troll Parkerchevy
      Troll-Troll
    Joined
  7. Hayk Vardanyan
    Hayk Vardanyan
      Member
    Joined
  8. tunedbycasco
    tunedbycasco
      Member
    Joined
  9. freehugs
    freehugs
      Member
    Joined
  10. ceberon
    ceberon
      Member
    Joined

CameraLoops™
Powered by Art
All Trademarks appearing on this website are the property of their respective owners.

Account

Navigation

Configure browser push notifications

Chrome (Android)
  1. Tap the lock icon next to the address bar.
  2. Tap Permissions → Notifications.
  3. Adjust your preference.
Chrome (Desktop)
  1. Click the padlock icon in the address bar.
  2. Select Site settings.
  3. Find Notifications and adjust your preference.